• Home
  • My bio & building philosophy
  • Instrument Making Supplies For Sale
    • Guitar Sets For Sale
    • Ukulele Sets For Sale Page 1 >
      • Ukulele Sets For Sale Page 2
      • Ukulele Sets Page 3
      • Ukulele Sets For Sale Page 4
      • Ukulele Sets For Sale Page 5
      • Ukulele Sets For Sale Page 6
      • Orphan Ukulele Sets
      • Ukulele Sets For Sale Page 8
    • Curly Koa Binding & Headcaps For Sale
    • Bending Blankets
    • Ukulele Building Plans
    • Ukulele Fret Slotting Temlates
    • Ebony & Rosewood Slotted Ukulele Fretboards
    • Ukulele & Guitar Pickups
    • Lap Steel Guitar Supplies
  • Instrument Orders
  • Website Directory
  • Soprano Ukuleles
  • Concert Ukuleles
    • Concert Ukuleles Page 2
    • Concert Ukuleles Page 3
    • Concert Ukuleles Page 4
    • Concert Ukulele 9/2019
  • Tenor Ukuleles
    • Tenor ukuleles page 2
    • TENOR UKULELES PAGE 3
    • Tenor Ukuleles Page 4
    • Curly Mango Tenor Ukulele For Sale 2/14/16
    • Sandelwood Tenor Ukulele For Sale
    • Tenor Ukulele 8/1/16
    • Tenor Ukulele 10/2/16
    • Natural Series Tenor Ukulele For Sale August 2019
    • Curly Koa Tenor Ukulele 3/19
    • Milo Tenor Ukulele
    • Tenor ukulele Page 3
    • Recycled Redwood Tenor Ukulele
    • Traditional tenor 9/2019
  • Archtop Ukuleles
  • Archtop Guitars
  • Acoustic Guitars
    • Naio Guitar
    • Milo Guitar For Sale
  • Lap Steel Guitars
    • Mango Lap Steel Guitar For Sale
    • Koa Lap Steel Guitar For Sale
  • Electric Guitars
  • Articles of interest to builders
    • Making a drill press powered radius jig
    • The Moxon Vise
    • Making a Notched Fretboard Straight Edge
    • Soundport Construction
    • Bending Curly Binding
    • Making Go Bars
    • How to tie the 3 hole bridge
    • Radius Brace Making
    • Inlay Techniques
    • Joining Tops & Backs
    • How I Bend Guitar & Ukulele Sides
    • Shaping Kerfing
    • Making Kerfing
    • Uke neck making
    • Neck Removal
    • Shop Tips
    • Tablesaw zero throat jig for binding and kerfing
    • Resawing 1
    • Slotting Fretboards
    • neck heel carving jig
    • A Subjective Glue Test
  • About Koa
    • Growing Koa
    • Milling Logs
    • Planting Koa
    • The Koa Forest
  • Contact info
  • Shop Projects
  • New Instruments For Sale
  • Brazilian Rosewood Tenor for sale
  • Pegasus Logo T-Shirts
  • New Natural Series Tenor Ukulele 1
  • New Natural Series Tenor Ukulele #2
  • Natural Series Classic Tenor ukulele November 2019
  • New Natural Series Classic Tenor Ukulele 4/24/19
  • "0" Size Acoustic Guitar 2019
  • Natural Series Tenor Ukulele For Sale 05/2019
  • Life Outside of Lutherie
  • Life Outside of Lutherie Page 2
  • Ordering a Natural Series Tenor Ukulele
  • Plants
  • Tenor Ukulele For Sale 1/31/2020
  • Sharpening Ultimate Scrapers
  • Curly Koa Tenor Ukulele For Sale March 2020
  • Current Shop Projects
  • Natural Tenor Ukulele For Sale 6/2020
  • Soprano Uke 6/2020
  • Kerfing Page 2
  • New Classic Model Tenor Ukulele 9/2020
  • Traditional Tenor Ukulele 10/2020
  • Artist Series Tenor 10/2020
  • Builder's Supplies
  • Guitar Sets For Sale Page 2
  • Curly Redwood/Curly Myrtle Tenor Ukulele 1/18/20
  • Horses
  • Maple/Redwood Tenor Ukulele
  • grinder
  • New Uke April 10, 2021
  • Scott
  • Martin Soprano Ukulele For Sale
  • Ukulele Neck Wood For Sale
    • Planing Small Pieces of Wood
  • New Curly Koa Traditional Model Ukulele For Sale 10/10/21
  • Kauri Tenor 10/11/21
  • Applying Wood Bindings
  • Neck
  • New Page
  • Pegasus Vintage Model
  • Building a Custom Guitar Page 2
  • All in a Days Work
  • Grover Tuners For Builders
  • Builders Closeout/Specials Page
Applying Wood Bindings
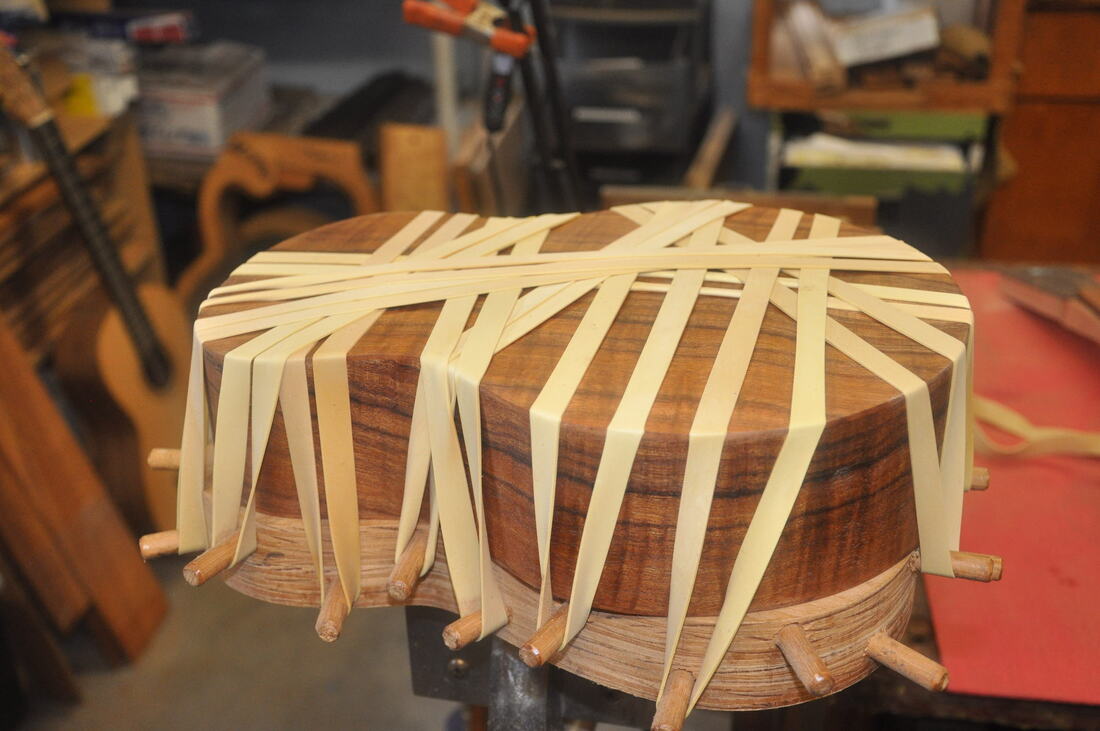
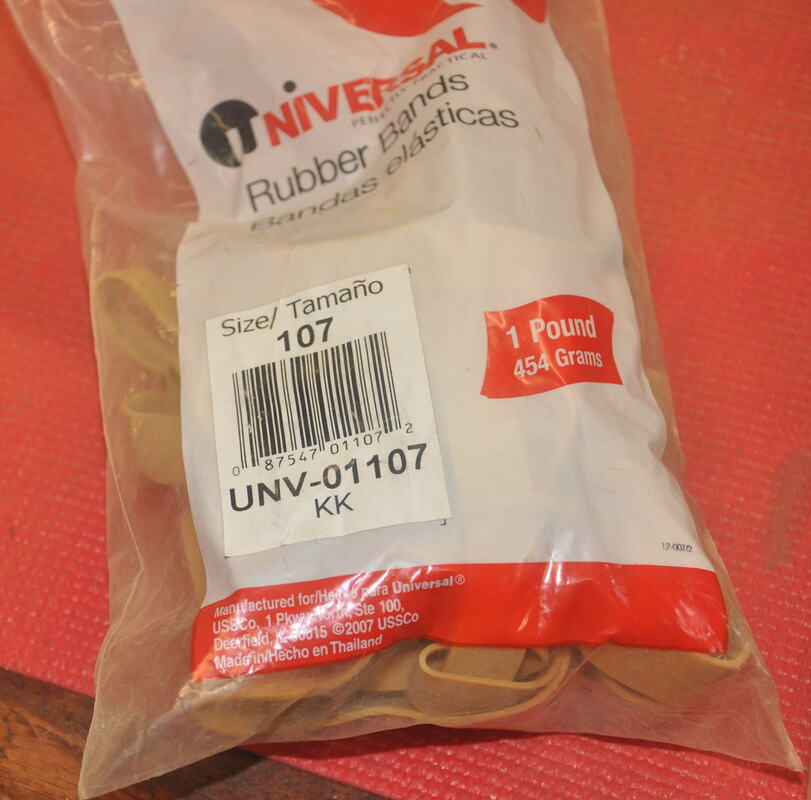
     This is a temporary page that shows the jigs I use to apply wood bindings. IMO, tape is not strong enough to do a good job with getting tight fitting wood bindings. To get a tight fit with tape, the binding needs to be bent perfectly to the shape of the instruments, and that often is not easy to do. These #107 rubber bands are easy to use and easily adjustaible to apply pressure exactly where you need it. For guitars the same rubber bands will work, but you have to loop them together 2 at a time to get the length you need. With the rubber bands, the bindings still need to be bent very close to the right shape. but rubber bands will pull them much tighter than tape ever will. Also, with the rubber bands you can easily check under them to see if the binding is tight. Shifting the bands a little allows you to clean up some of the excess glue before it dries.If you are lucky enough to have a stationary store near you, you can get them there. Otherwise, get them on Amazon.
Picture
     Here is the binding jig. The reason I use 2 pieces of stacked and glued plywood for the base is that the plywood layers can separate when you drill the peg holes using only 1 piece . The first jigs I made using nails instead of wood dowels, but the nails tended to cut the rubber bands. I now use 1/4" or 3/8" (preferred) wood dowels. The jig has a wood cleat on the botton for holding in a vise. The base should be cut to the actual shape of your instruments, so that the bands can pull straight down on the binding. You'll figure that out when you use the jig. I glue 1 side at a time, so it takes 4 sessions to complete the job. With Titebond, you can remove the rubber bands in a couple of hours at most, so the entire uke can be done in a day or 2.
Picture
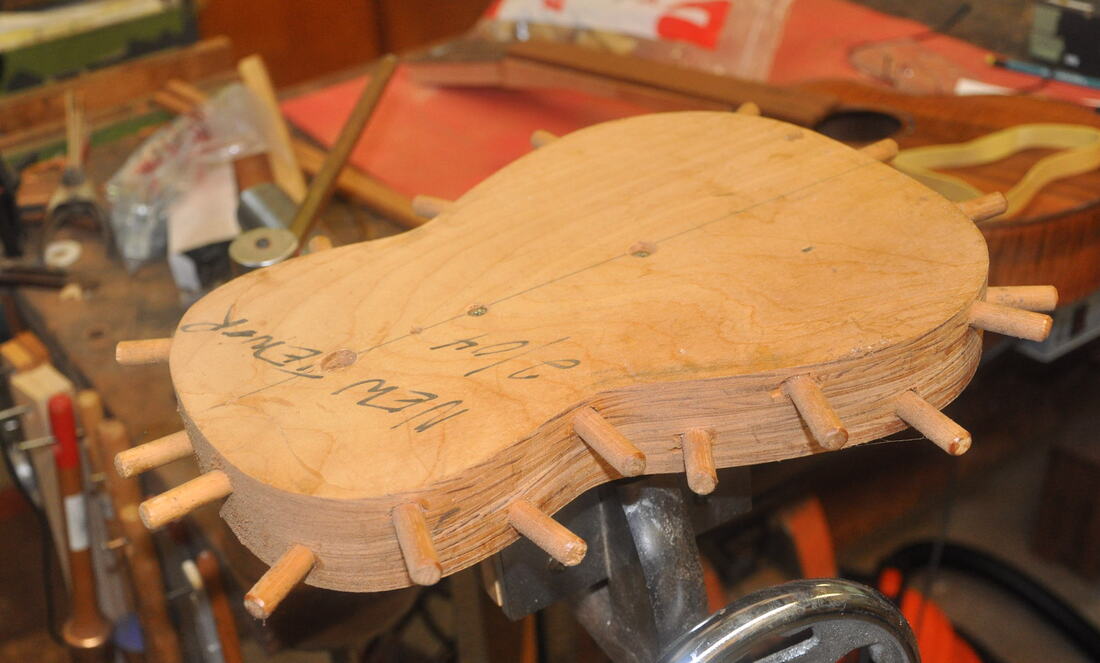
      I don't have an instrument at the binding stage right now, so this is just a mock up. I think the reader will get the idea.There are other tricks to get clean binding jobs and I'll try to post them next time I do binding.
Picture


Website Directory
Proudly powered by Weebly