• Home
  • My bio & building philosophy
  • Instrument Making Supplies For Sale
    • Guitar Sets For Sale
    • Ukulele Sets For Sale Page 1
    • Curly Koa Binding & Headcaps For Sale
    • Bending Blankets
    • Ukulele Building Plans
    • Inlay Supplies
    • Ukulele Fret Slotting Temlates
    • Ebony & Rosewood Slotted Ukulele Fretboards
    • Ukulele Pickup Systems For Sale >
      • Ukulele & Guitar Pickups
    • Lap Steel Guitar Supplies
  • Instrument Orders
  • Website Directory
  • Gallery
    • Soprano Ukuleles
    • Concert Ukuleles >
      • Concert Ukuleles Page 2
      • Concert Ukuleles Page 3
      • Concert Ukuleles Page 4
      • Concert Ukulele 9/2019
    • Tenor Ukuleles >
      • Tenor ukuleles page 2
      • TENOR UKULELES PAGE 3
      • Tenor Ukuleles Page 4
      • Curly Mango Tenor Ukulele For Sale 2/14/16
      • Sandelwood Tenor Ukulele For Sale
      • Tenor Ukulele 8/1/16
      • Tenor Ukulele 10/2/16
      • Natural Series Tenor Ukulele For Sale August 2019
      • Curly Koa Tenor Ukulele 3/19
      • Milo Tenor Ukulele
      • Tenor ukulele Page 3
      • Recycled Redwood Tenor Ukulele
      • Sugi Pine/Milo Tenor
      • Traditional tenor 9/2019
    • Archtop Ukuleles
    • Archtop Guitars
    • Acoustic Guitars >
      • Naio Guitar
      • Milo Guitar For Sale
    • Lap Steel Guitars >
      • Mango Lap Steel Guitar For Sale
      • Koa Lap Steel Guitar For Sale
    • Electric Guitars
  • Articles of interest to builders
    • Making a Notched Fretboard Straight Edge
    • Soundport Construction
    • Bending Curly Binding
    • Making Go Bars
    • How to tie the 3 hole bridge
    • Radius Brace Making
    • Inlay Techniques
    • Joining Tops & Backs
    • How I Bend Guitar & Ukulele Sides
    • Shaping Kerfing
    • Making Kerfing
    • Uke neck making
    • Neck Removal
    • Shop Tips
    • Tablesaw zero throat jig for binding and kerfing
    • Slotting Fretboards
    • neck heel carving jig
    • Resaw Tricks
    • A Subjective Glue Test
  • About Koa
    • Growing Koa
    • Milling Logs
    • Planting Koa
    • The Koa Forest
  • Contact info
  • Shop Projects
  • New Instruments For Sale
  • Brazilian Rosewood Tenor for sale
  • Pegasus Logo T-Shirts
  • New Natural Series Tenor Ukulele 1
  • New Natural Series Tenor Ukulele #2
  • Natural Series Classic Tenor ukulele November 2019
  • New Natural Series Classic Tenor Ukulele 4/24/19
  • "0" Size Acoustic Guitar 2019
  • Natural Series Tenor Ukulele For Sale 05/2019
  • Life Outside of Lutherie
  • Life Outside of Lutherie Page 2
  • Ordering a Natural Series Tenor Ukulele
  • Plants
  • Tenor Ukulele For Sale 1/31/2020
  • Sharpening Ultimate Scrapers
  • Curly Koa Tenor Ukulele For Sale March 2020
  • Current Shop Projects
  • Natural Tenor Ukulele For Sale 6/2020
  • Soprano Uke 6/2020
  • Kerfing Page 2
  • New Classic Model Tenor Ukulele 9/2020
  • Ukulele Sets Page 3
  • Ukulele Sets For Sale Page 4
  • Ukulele Sets For Sale Page 2
  • Cleaning up Binding
  • Traditional Tenor Ukulele 10/2020
  • Artist Series Tenor 10/2020
  • New tenor 11/20/20
  • Builder's Supplies
  • Grover Ukulele Tuners
  • Guitar Sets For Sale Page 2
  • Gretchen
  • Zoom info 12/18/20

Making Ukulele Necks

There are many ways to make a neck. This is my current method. I use quarter sawn Spanish cedar or Honduras mahogany. It all starts with a block of wood.
Picture
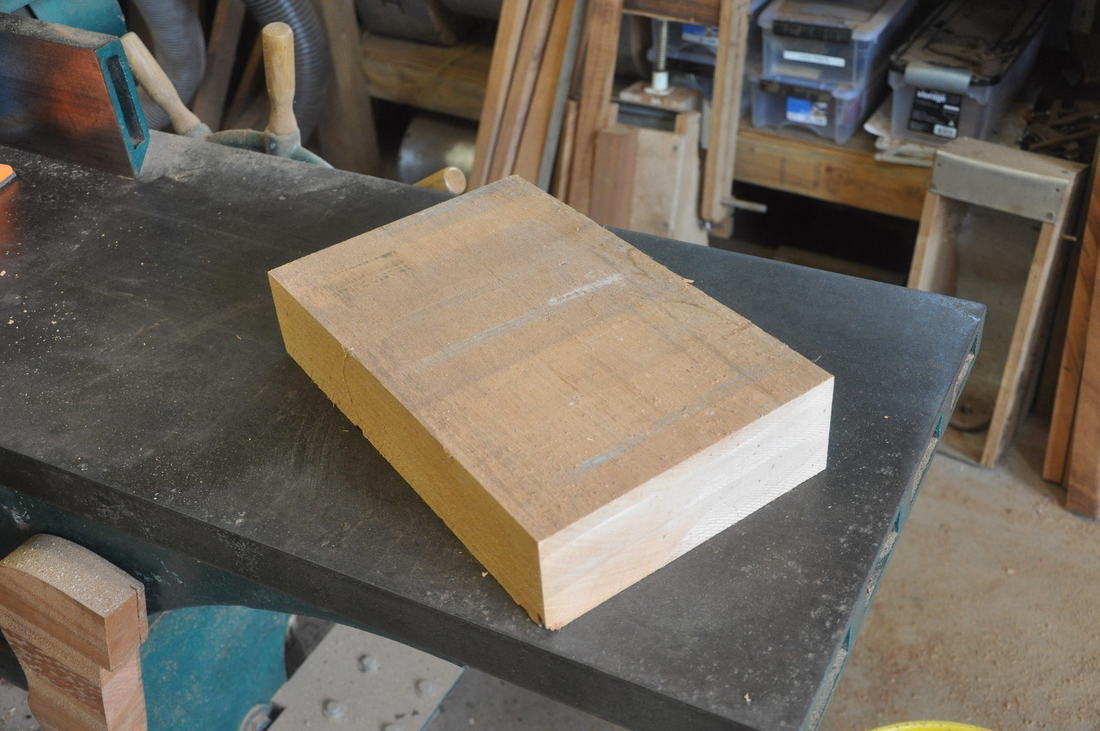
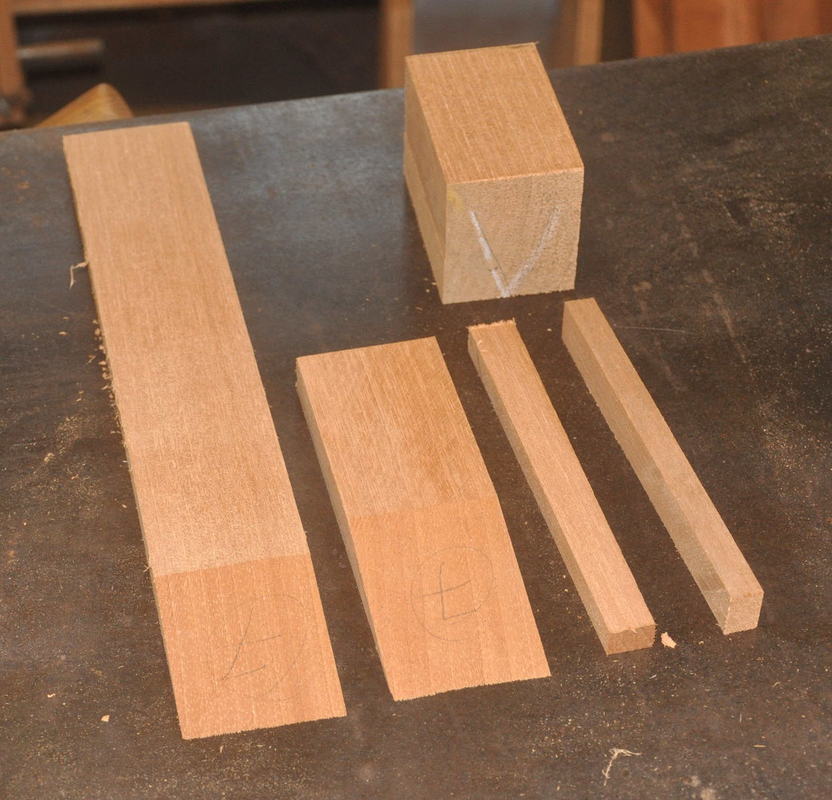
All the parts for a neck are cut from the same piece of wood whenever possible. If you use wood from 2 different trees, the color match will not be perfect
Picture
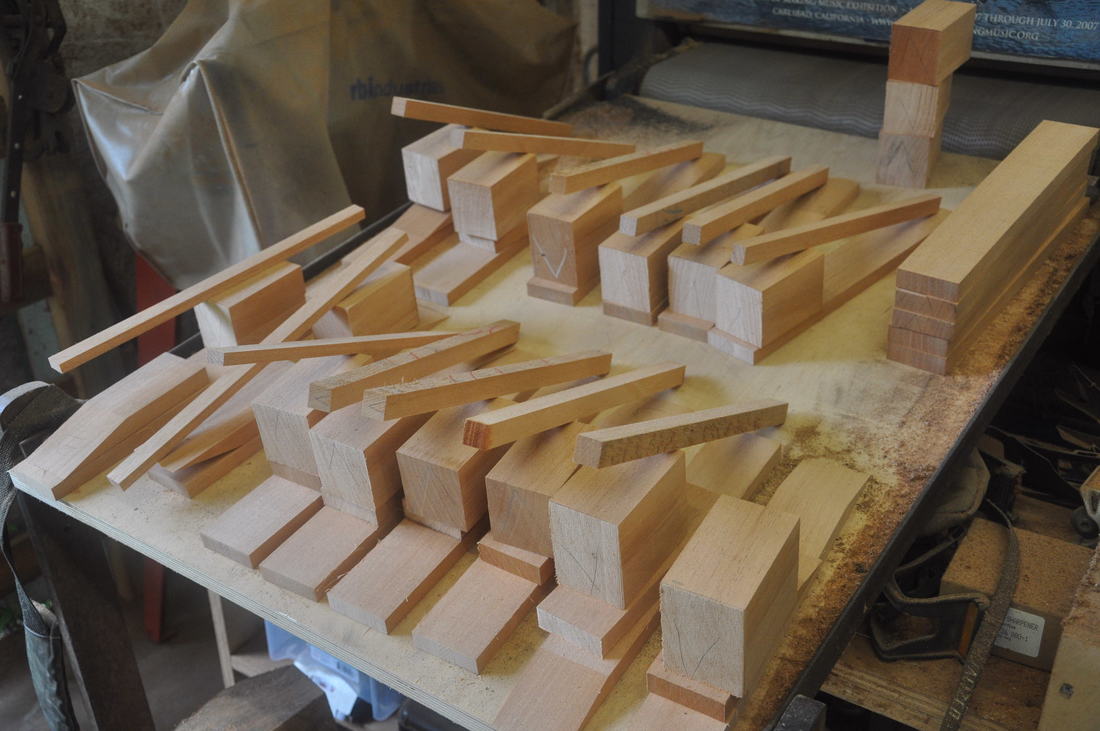
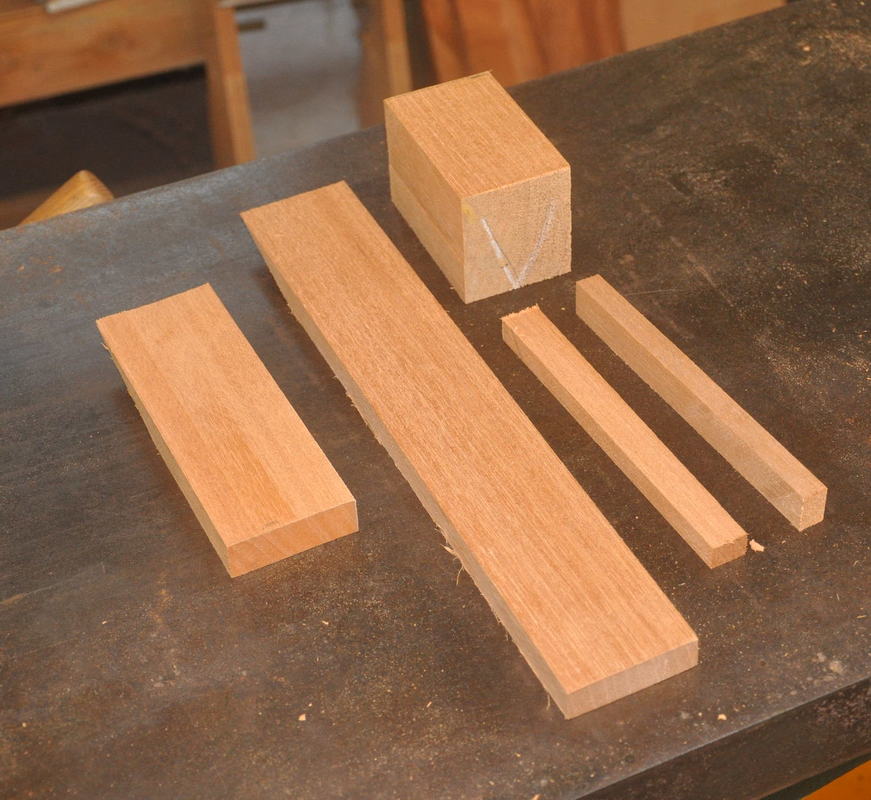
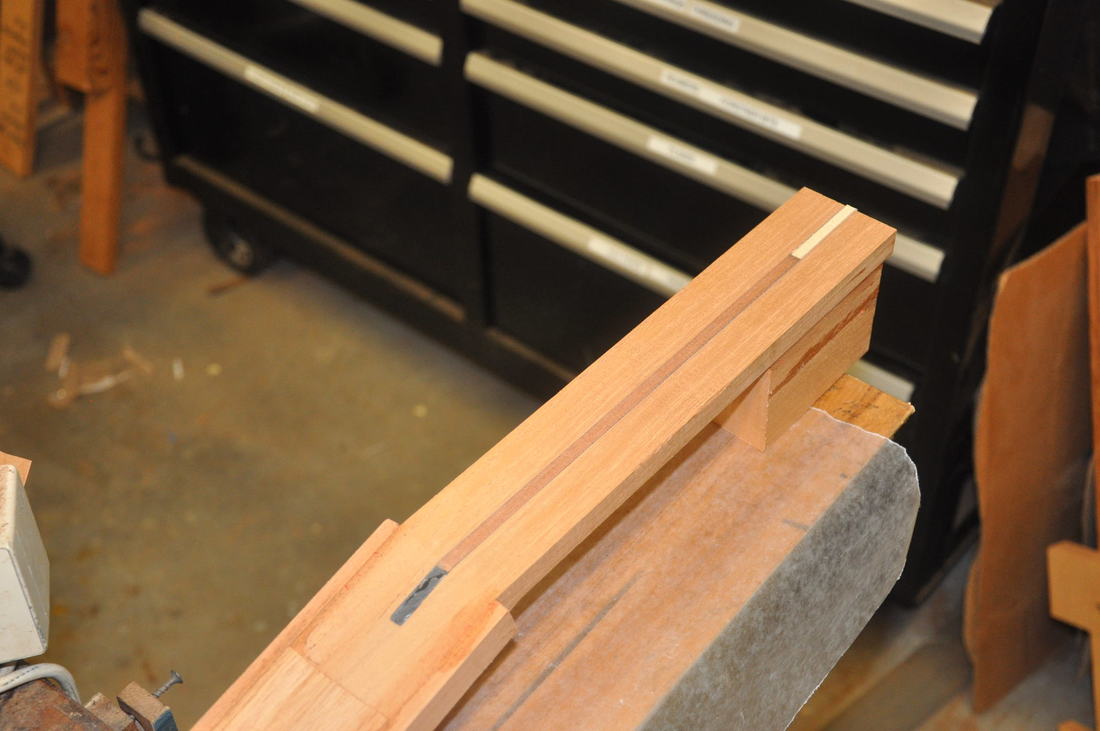
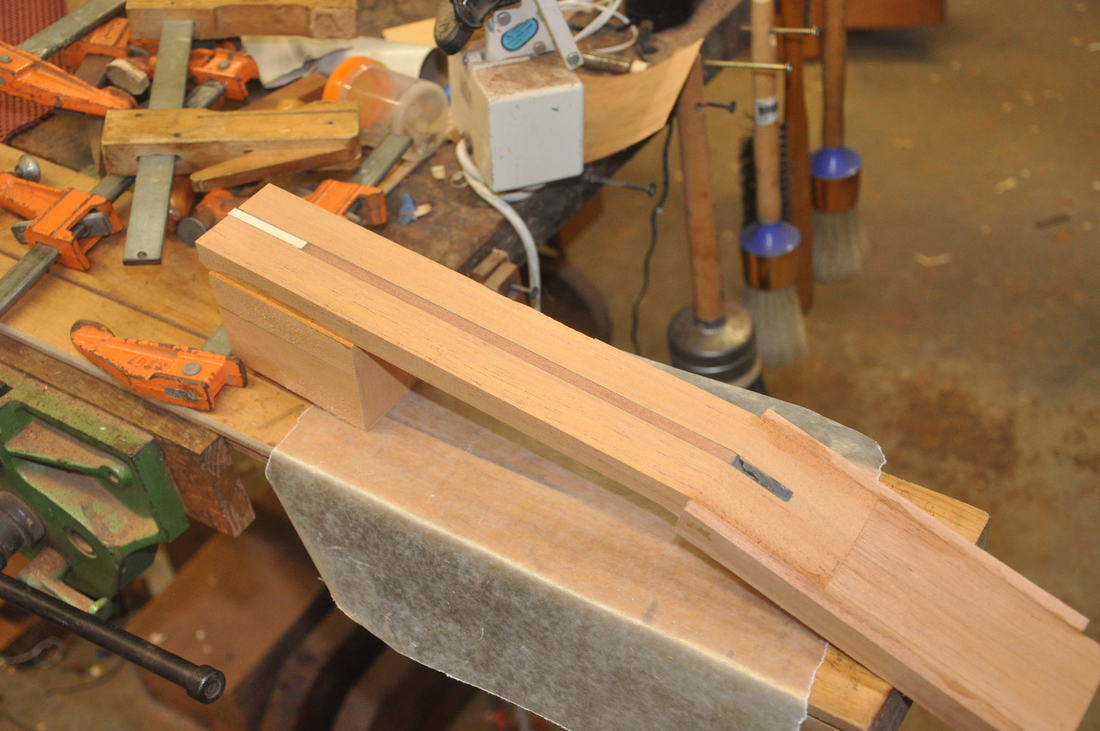
Here are the 5 pieces that it takes to make a neck. By adding on separate ears to the head, you use much less wood than if you left the whole neck shaft wide enough to make the headstock. The ears also cover and strengthen the scarf joint that joins the head to the neck shaft.
Picture
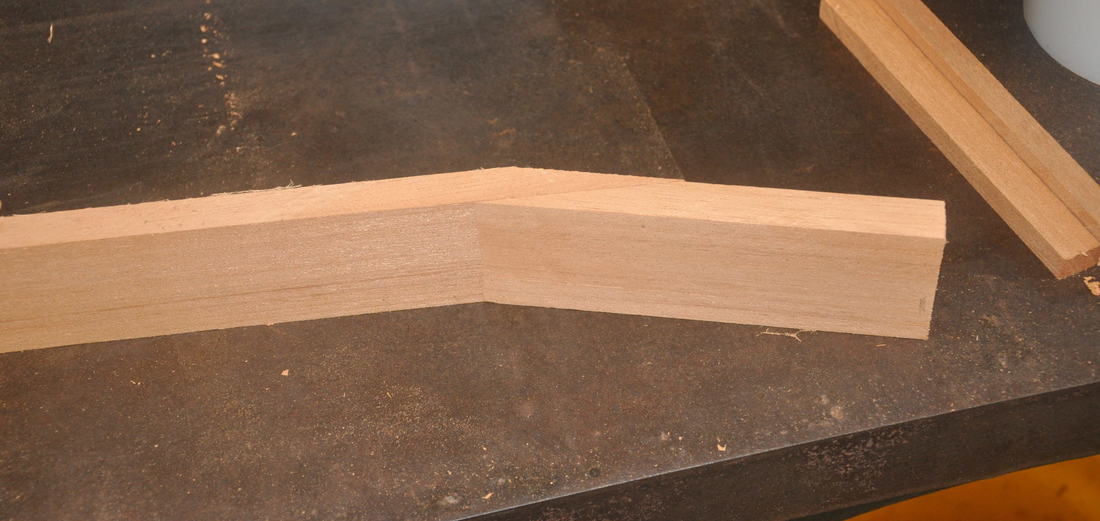
I have cut the 14 degree scarf joint in many ways over the years. You can a bandsaw and hand plane it, use a tables  cut by hand with a backsaw or Japanese saw, or use a chop saw as I do now. If you set up the chop saw correctly, it will cut a perfect scarf joint, ready to glue up. If you use a sliding chop saw, make sure to lock the slide so the blade does not jump out at you!
Picture
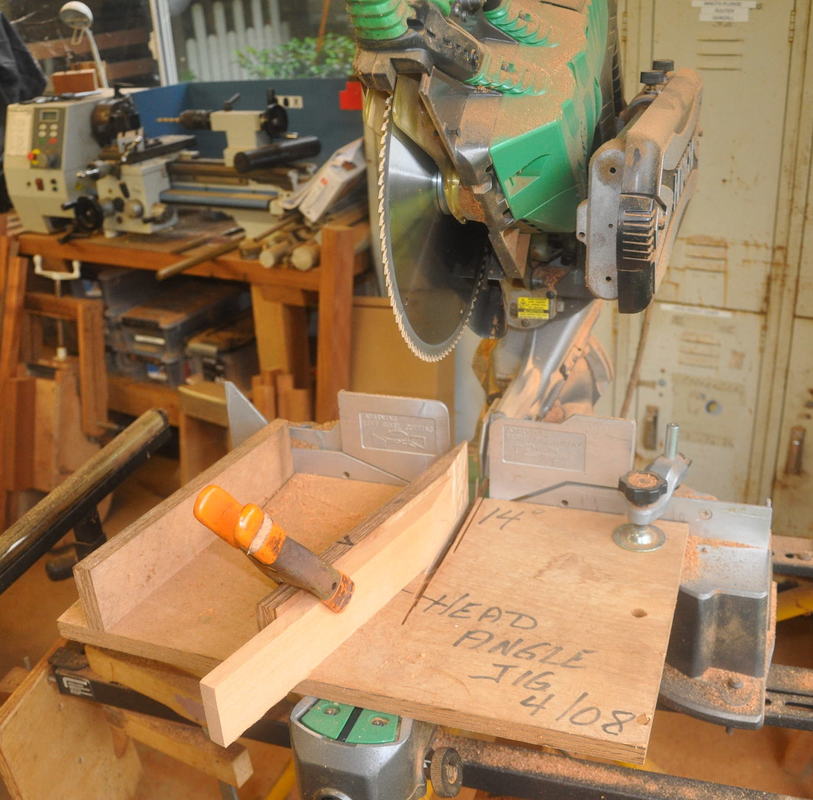
Here you can see the 14 degree scarf joint.
Picture
Picture
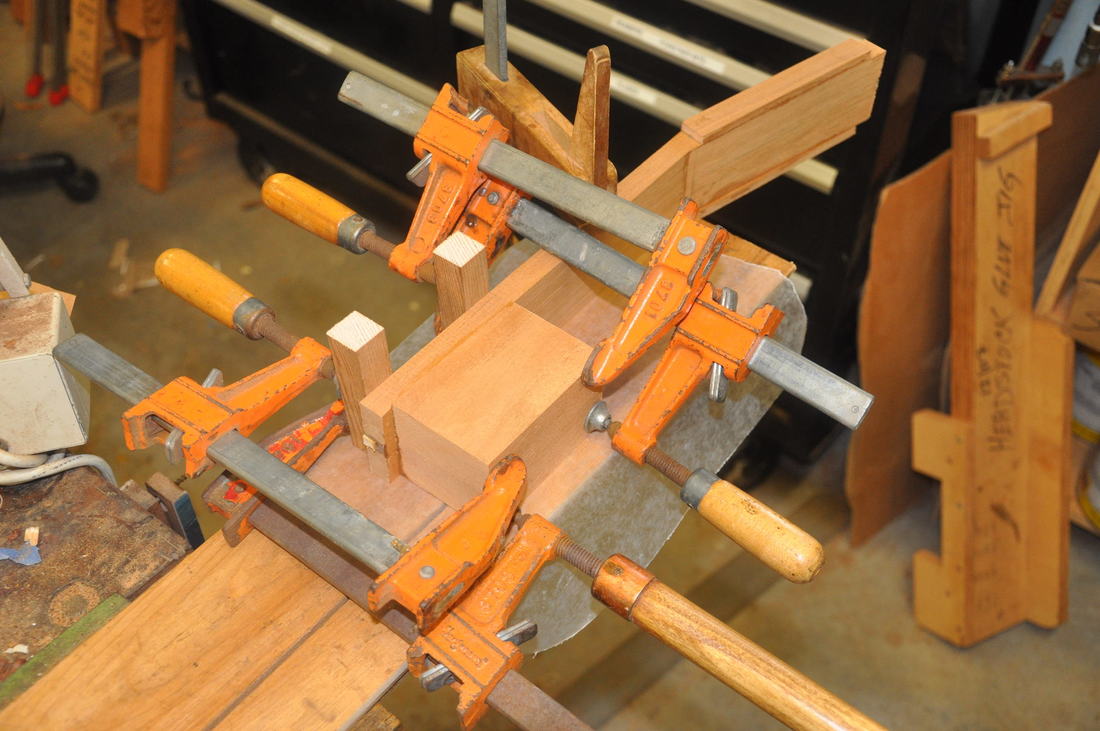
Unless you are in production, the best way  to glue the scarf joint is to use 4 clamps. I've tried many jigs, and I think the clamp method is good as any. Main thing is that it always works!
Picture
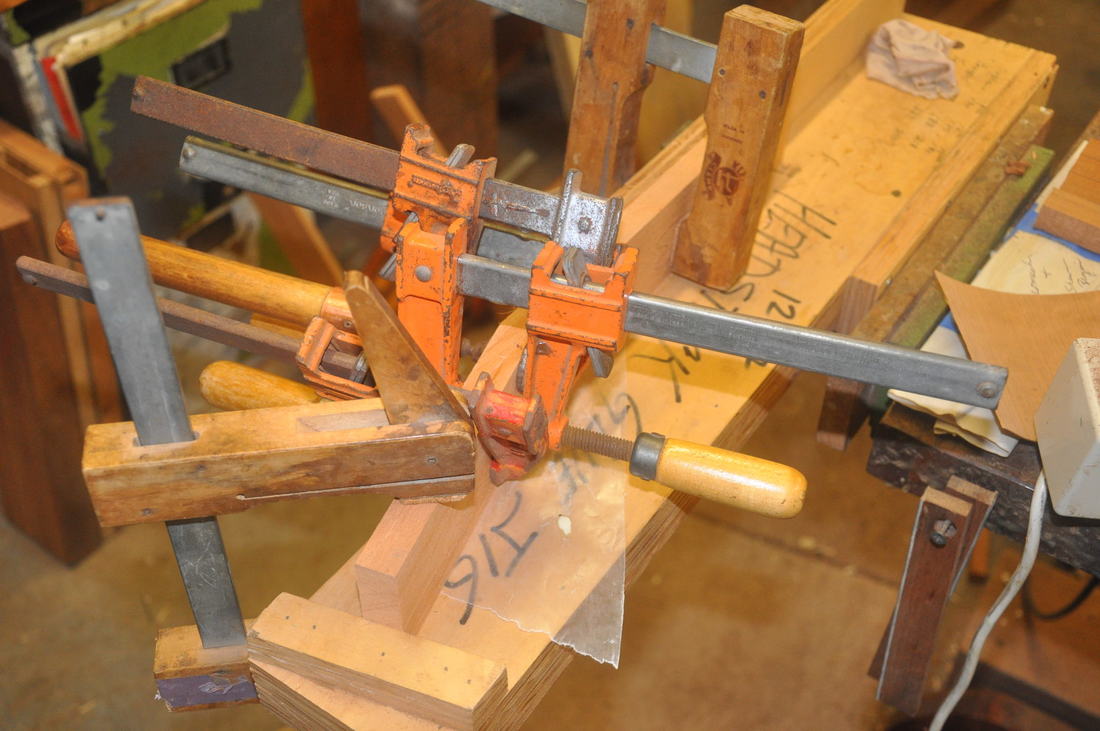
Same thing with the ears. No jig needed.
Picture
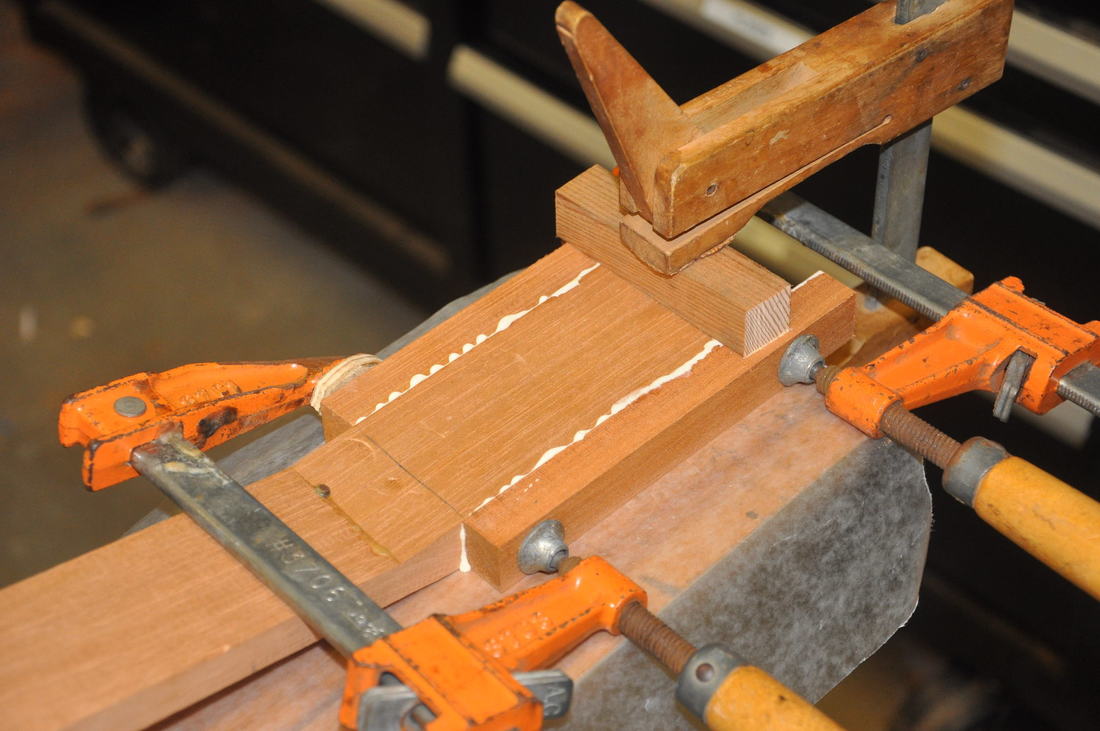
When you glue on the heel block, make sure to use cauls on the fretboard side of the neck so as not to dent it with the clamps. Decide if you will have a 12 fret or 14 fret neck and what kind of neck joint you will have before you glue the heel block on. Make sure you have a long enough neck block to make the joint you want.
Picture
Many of us use carbon fiber neck reinforcements. If you decide to do that, use a router or table saw to cut the slot BEFORE you glue the ears on the head. I bury my carbon fiber about 1/8" below the neck shaft surface to allow me to level the neck if necessary. Also make sure you stop the carbon fiber short of the heel end of the neck. Carbon fiber is death to tools and you don't want to try to chisel or rout it.
Picture
Picture
Any questions, please feel free to e-mail me pegasusguitars@hawaiiantel.net  Enjoy your building!--Bob


Website Directory
Proudly powered by Weebly