The Moxon Vise
The Moxon vise dates from at least the 1600's. It was named after Frederick Moxon who first illustrated it in a woodworking book. Versions of it can be found in fine woodworking shops everywhere. It is extremely useful in the luthier shop and here is an inexpensive version of it that can be quickly built at minimal cost.
Following the video is a materials list and some construction notes. Sizes can be adapted to suit you needs. You can enlarge the video by clicking the expand arrows in the lower right corner. Feel free to contact me at [email protected] for further info.
Here is a list of materials that I used for my Moxon vise. These dimensions will hold any size instument up to a guitar that is 4 1/2" in depth. You can easily make a vise that holds larger instruments by using longer pipes. Width could also easily be varied. I attached this vise to a backing that could be clamped in a vise so that I could remove it easily from the bench when not in use. You can also attach it permanently to your bench without the backing.
Material List
1. A set of 2 pipe clamps. I prefer the clamps made by Irwin because the screw handles do not need to be threaded onto the pipe. Jorganson clamps could also be used. I used 1/2" Irwin pipe clamps, but 3/4" clamps would also work. Irwin clamps are not in all the hardware stores, but they are on Amazon.
2. Two 12" sections of 1/2" or 3/4" pipes to fit your clamps. You only need threads on 1 end, so buy a 24" section, threaded both ends, and cut it in half.
3. Two 1/2" or 3/4" plumbing pipe flanges.
4. Assorted 1" and 1 1/2" drywall screws. For attaching the clamps to the jaws I used sixteen 1" long self tapping pan head screws. The flat bottoms work better on the clamps than drywall screws. You will have to drill holes through the pipe clamp faces to attach them to the wood jaws. The metal is soft and drills easily. Start with a small drill size and then enlarge it.
5.The jaws are made from 2 7/8" x 4 1/4" x 18 1/4" pieces of solid wood. Any kind wood, fir, even plywood, would work.
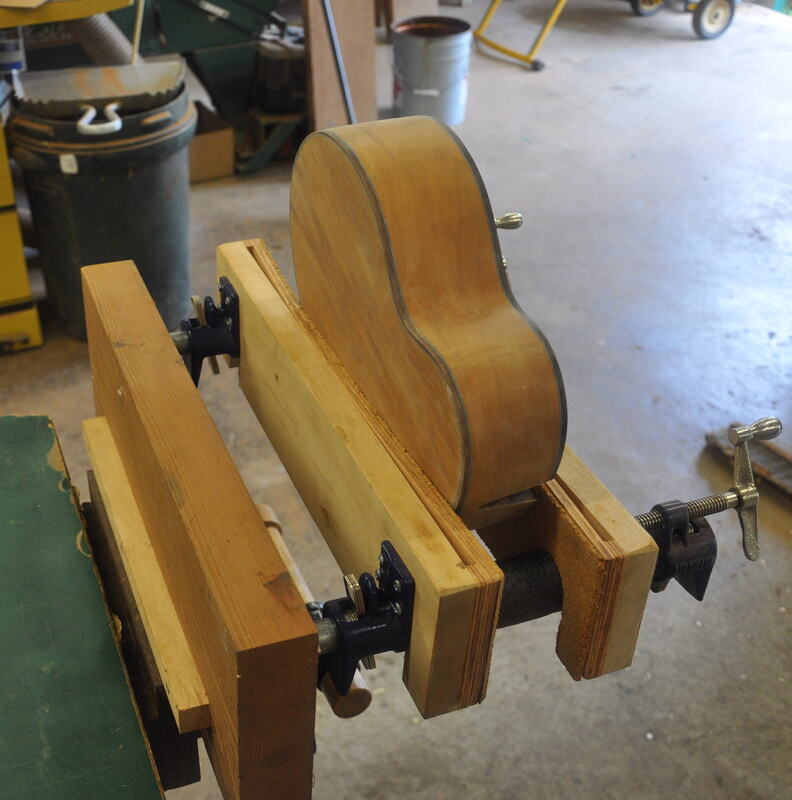
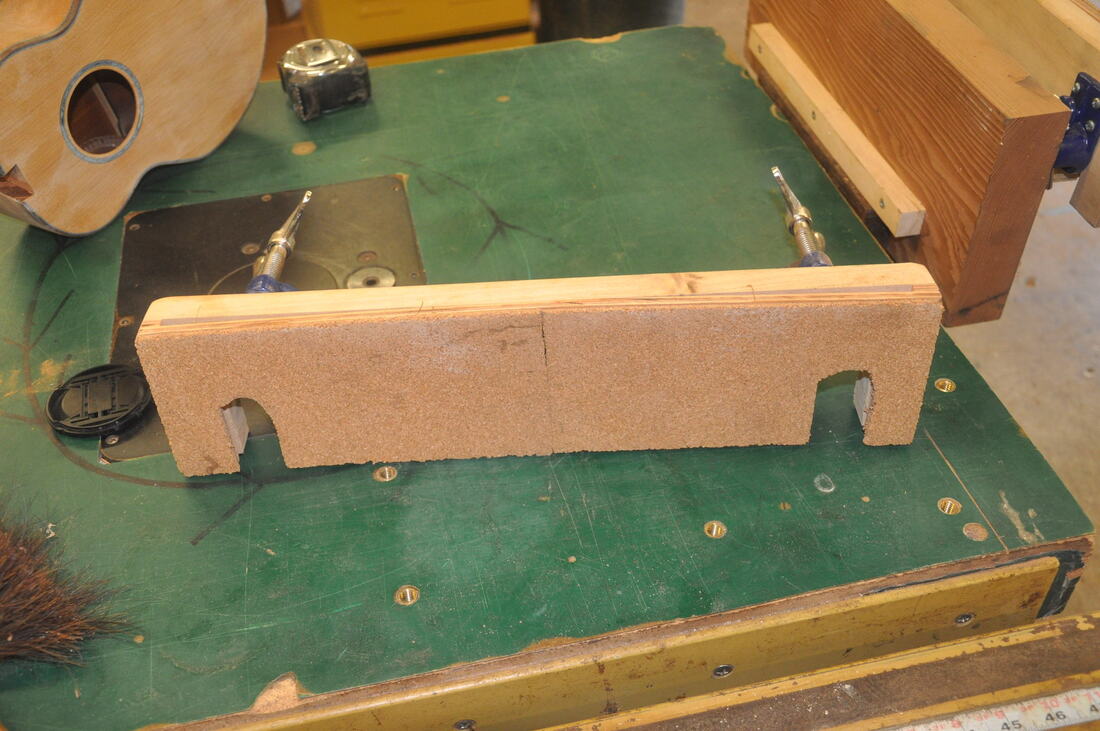
6. The radius pieces are 1/4" x 4 1/4": x 18 3/8" plywood. They are just slightly longer than the solid wood jaws because of the arch. The radius piece is scewed down to the jaw faces (you have to do this before you attach the cork) in the middle and shimmed on the end to create a radius. You can do this mathematically to determine the height of the shims needed for a specific radius, but I just used my radius gauge to figure that out. Make the shims just a little bit thicker than they need to be. They will be glued in, but you can adjust them before gluing to get a radius you like. You should make the radius slightly smaller than any of those on the tops or backs of your instruments. Mine are about an 11' foot radius to fit my 12' radius backs. The idea is that they will grip the edges of your instrument without applying force to the top or back and possibly popping braces off.
7. Enough 1/8" cork to cover the radius faces. The cork is attached with contact cement. I like to use the solvent base cement rather than the water base. It works better.
8.One 2" x 7 1/2" x 18 1/2"Solid wood backing to attach the vise to. Put a 1" x 1" x18" cleat on the back to make it easier to drop it into your vise and have it be self leveling. If you are permanently attaching the vise to your bench, then you don't need this piece.
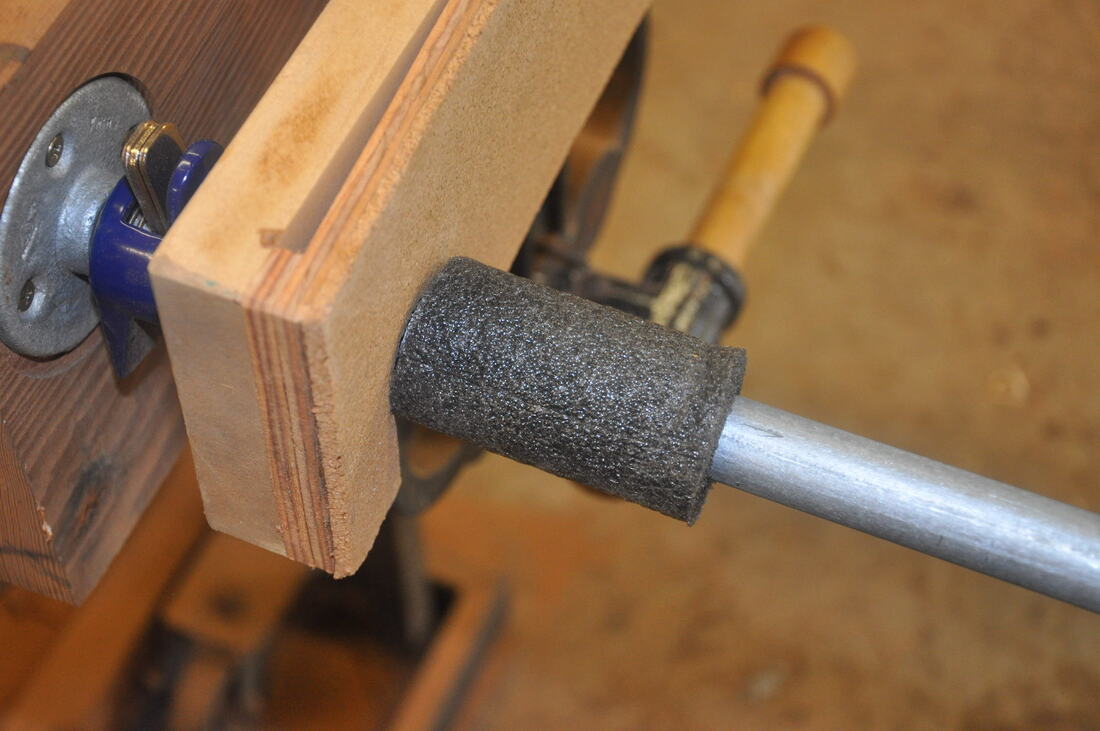
9. Cover the pipes with short pieces of pipe insulation to protect your work from being damaged. You can slit the insulation and slip it over the pipe so that you don't have to remove the front vise to put the insulation on.
10. In the various photos you will see that I countersunk the pipe flange. That is not necessary.
2. Two 12" sections of 1/2" or 3/4" pipes to fit your clamps. You only need threads on 1 end, so buy a 24" section, threaded both ends, and cut it in half.
3. Two 1/2" or 3/4" plumbing pipe flanges.
4. Assorted 1" and 1 1/2" drywall screws. For attaching the clamps to the jaws I used sixteen 1" long self tapping pan head screws. The flat bottoms work better on the clamps than drywall screws. You will have to drill holes through the pipe clamp faces to attach them to the wood jaws. The metal is soft and drills easily. Start with a small drill size and then enlarge it.
5.The jaws are made from 2 7/8" x 4 1/4" x 18 1/4" pieces of solid wood. Any kind wood, fir, even plywood, would work.
6. The radius pieces are 1/4" x 4 1/4": x 18 3/8" plywood. They are just slightly longer than the solid wood jaws because of the arch. The radius piece is scewed down to the jaw faces (you have to do this before you attach the cork) in the middle and shimmed on the end to create a radius. You can do this mathematically to determine the height of the shims needed for a specific radius, but I just used my radius gauge to figure that out. Make the shims just a little bit thicker than they need to be. They will be glued in, but you can adjust them before gluing to get a radius you like. You should make the radius slightly smaller than any of those on the tops or backs of your instruments. Mine are about an 11' foot radius to fit my 12' radius backs. The idea is that they will grip the edges of your instrument without applying force to the top or back and possibly popping braces off.
7. Enough 1/8" cork to cover the radius faces. The cork is attached with contact cement. I like to use the solvent base cement rather than the water base. It works better.
8.One 2" x 7 1/2" x 18 1/2"Solid wood backing to attach the vise to. Put a 1" x 1" x18" cleat on the back to make it easier to drop it into your vise and have it be self leveling. If you are permanently attaching the vise to your bench, then you don't need this piece.
9. Cover the pipes with short pieces of pipe insulation to protect your work from being damaged. You can slit the insulation and slip it over the pipe so that you don't have to remove the front vise to put the insulation on.
10. In the various photos you will see that I countersunk the pipe flange. That is not necessary.
Construction Tips
The photos below should tell most of he story. Alignment is critical. Measure carefully.
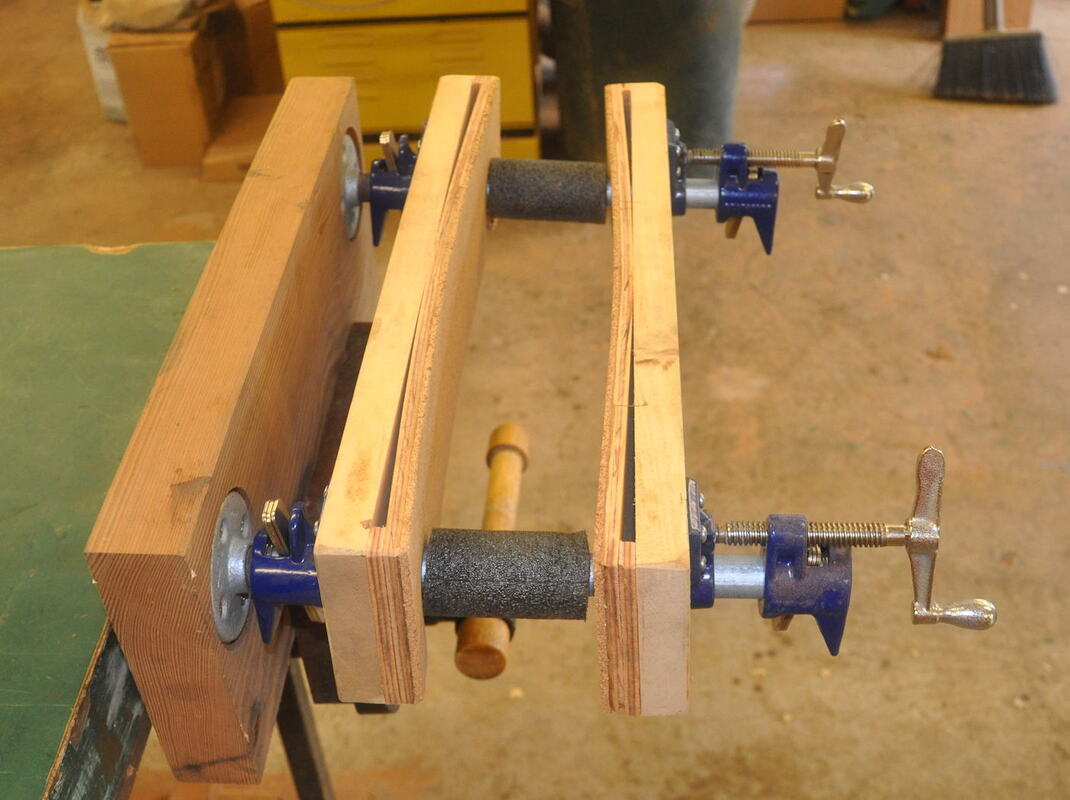
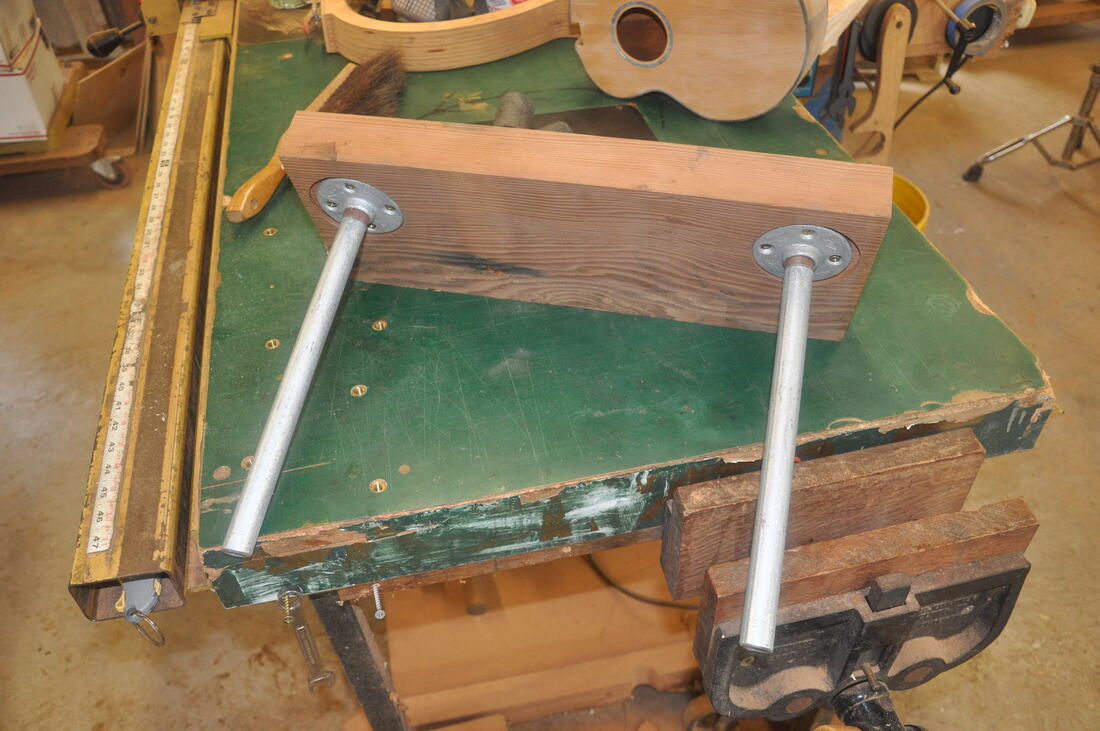
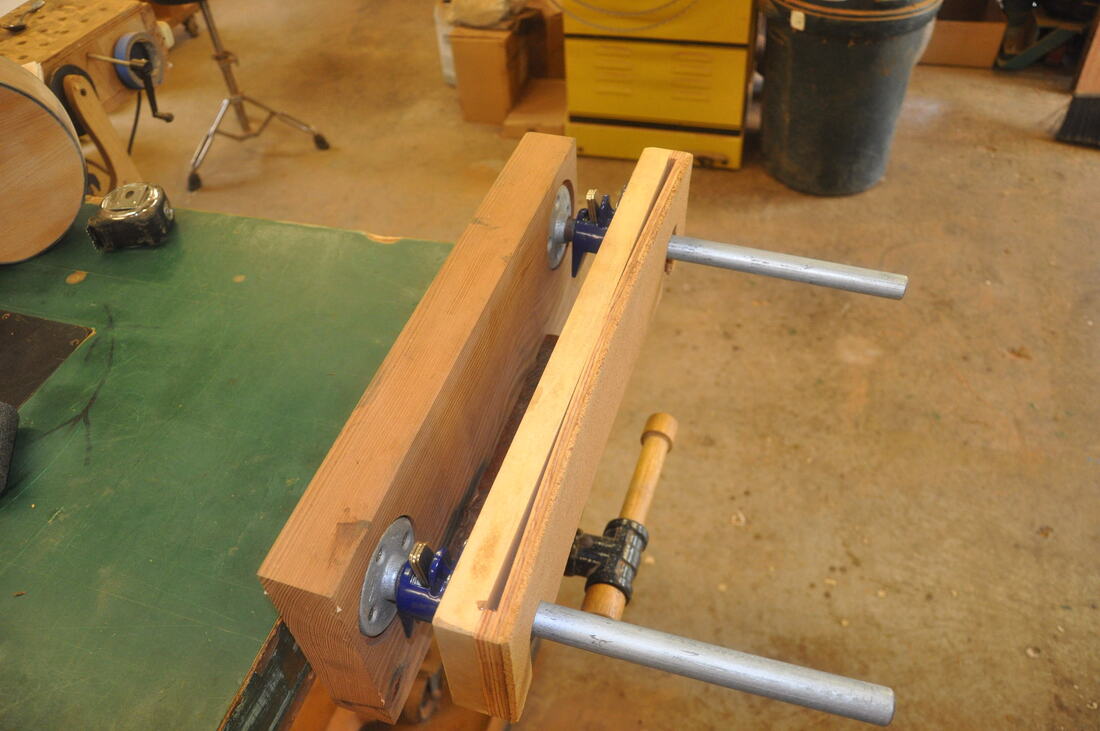
1. I mounted the center of my pipes 2 1/2" down from the top of the jaws and 2" in from the end. This is the only truly critical part of the project. You want the pipes level and parallel.Don't put screws in all the flange holes until you think you've got the pipes in the right position. It is not really that hard.
2. The quick release levers on the rear of the clamp are mounted facing up. On the front by the screw handles they face down. Just makes it easy to adjust.
3. When you have everything ready to go, use your sander to smooth the pipes and apply some paste wax.
4. Notice that I made slots in my wood faces to fit over the pipes instead of just holes. I found it gave me a little wiggle room to get the jaws positioned right.
5. To align the slots right for the pipes, I temporarily screwed my wood faces together , drilled a 1" hole for the pipe, and then bandsawed that into a slot.
4. Now you should be ready to MOX ON!
5. I am hoping there are enough photos to demonstrate the project, but if you find yourself thoroughly confused, feel free to contact me at [email protected]
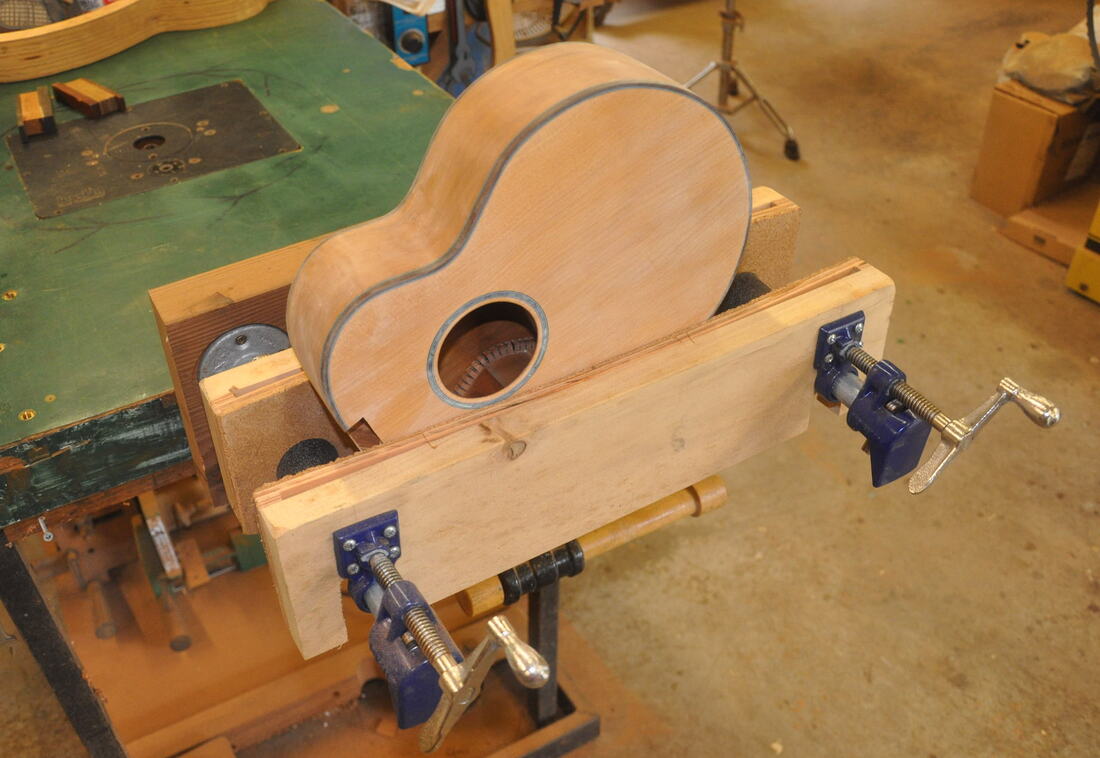
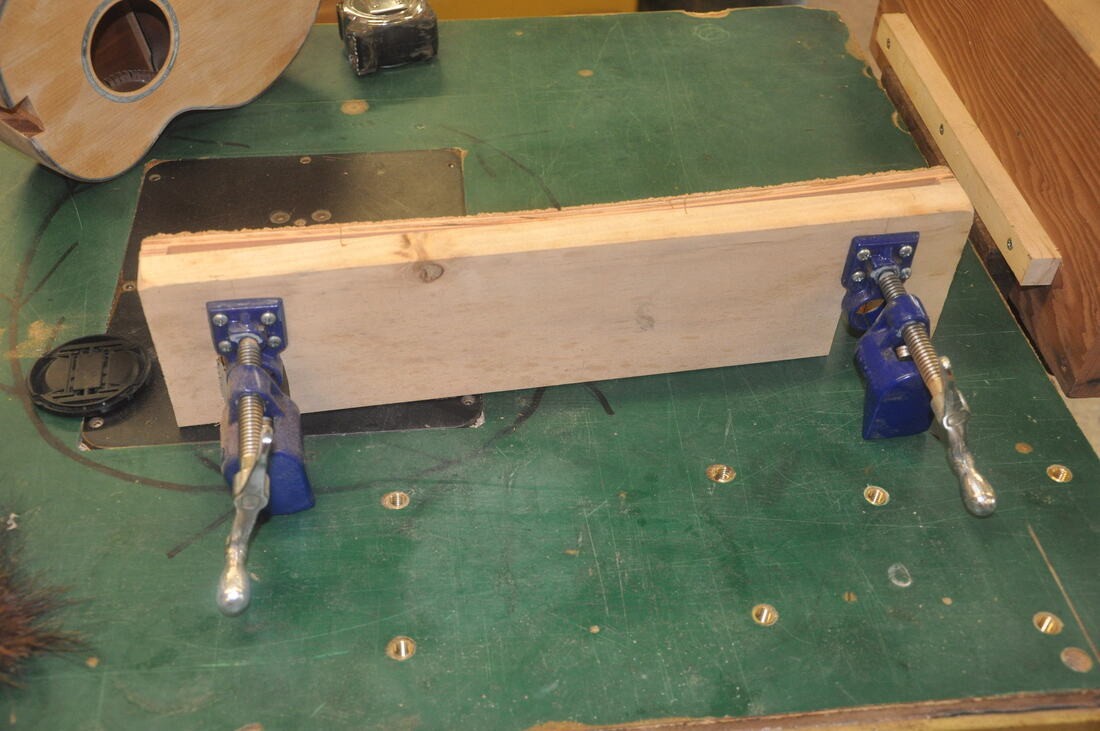
Uke in vise
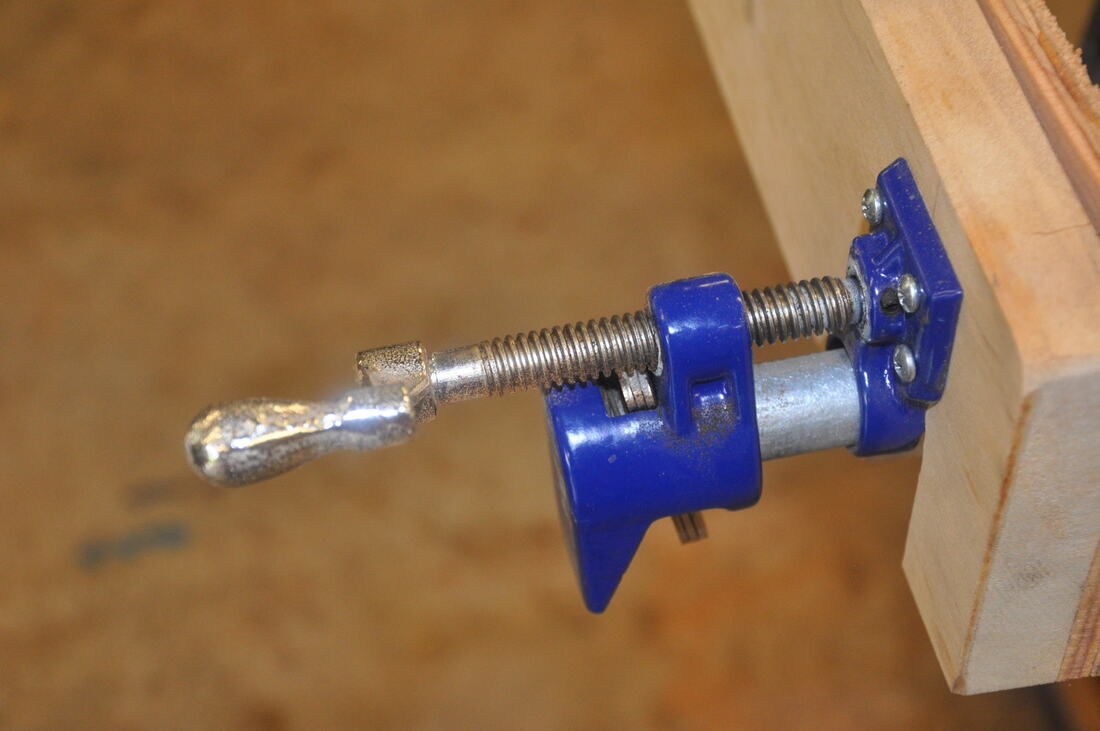
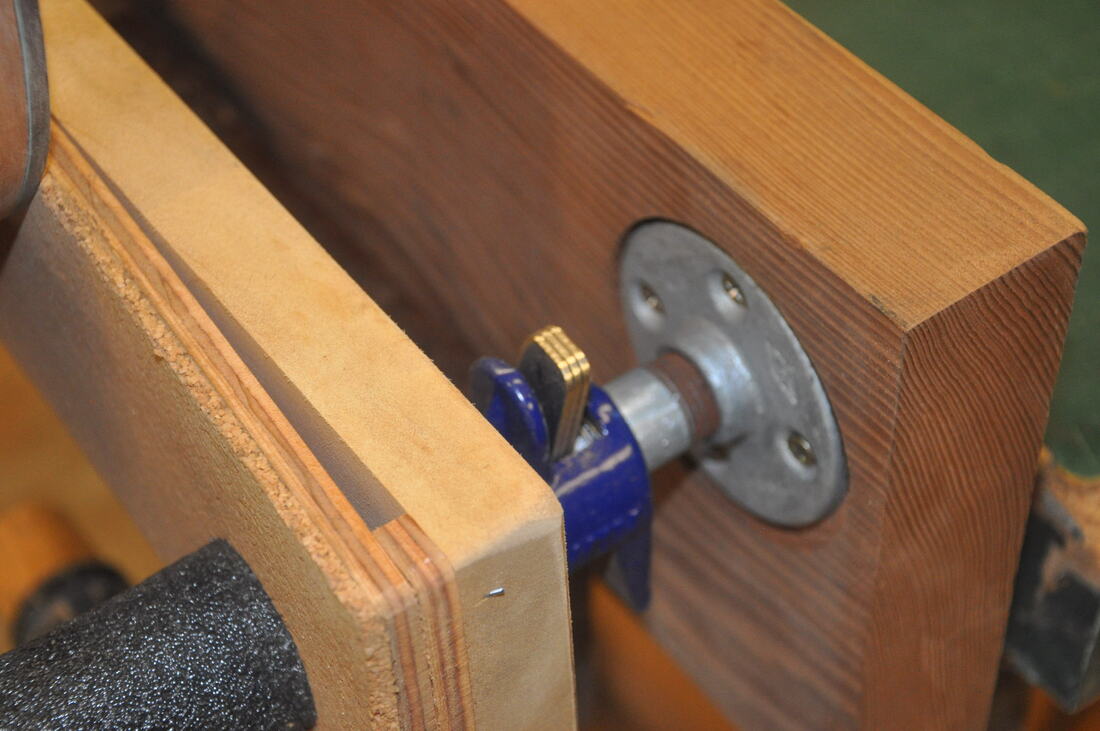
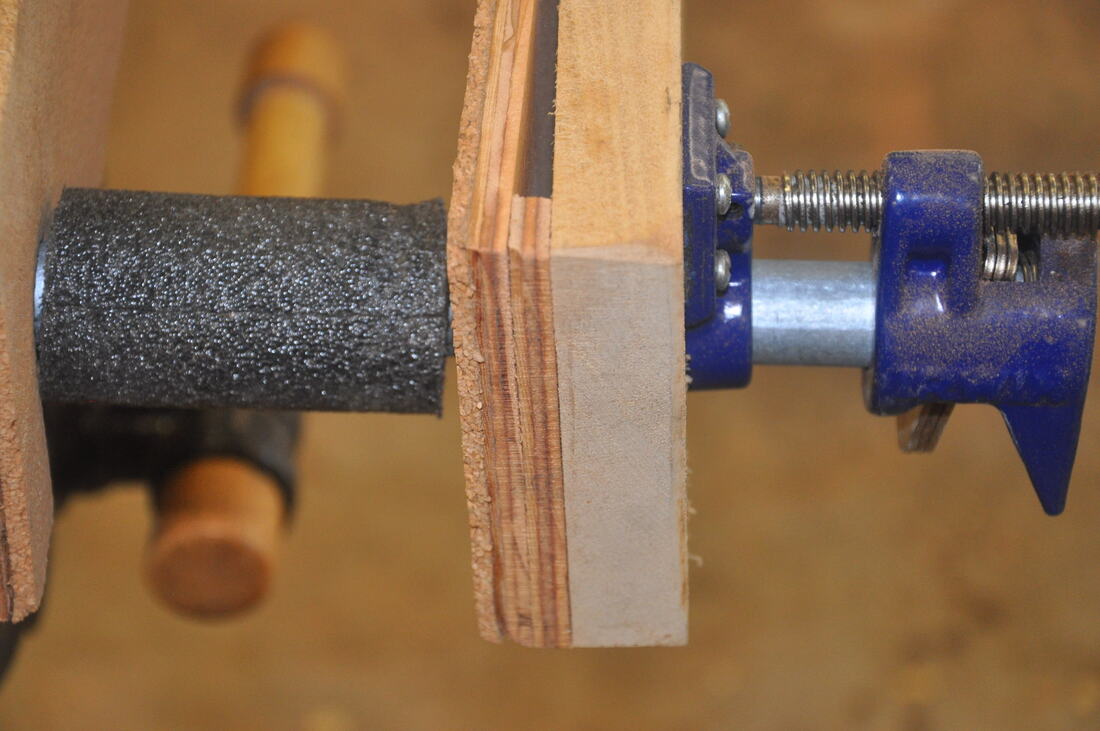
Screw mechanism on front vise face
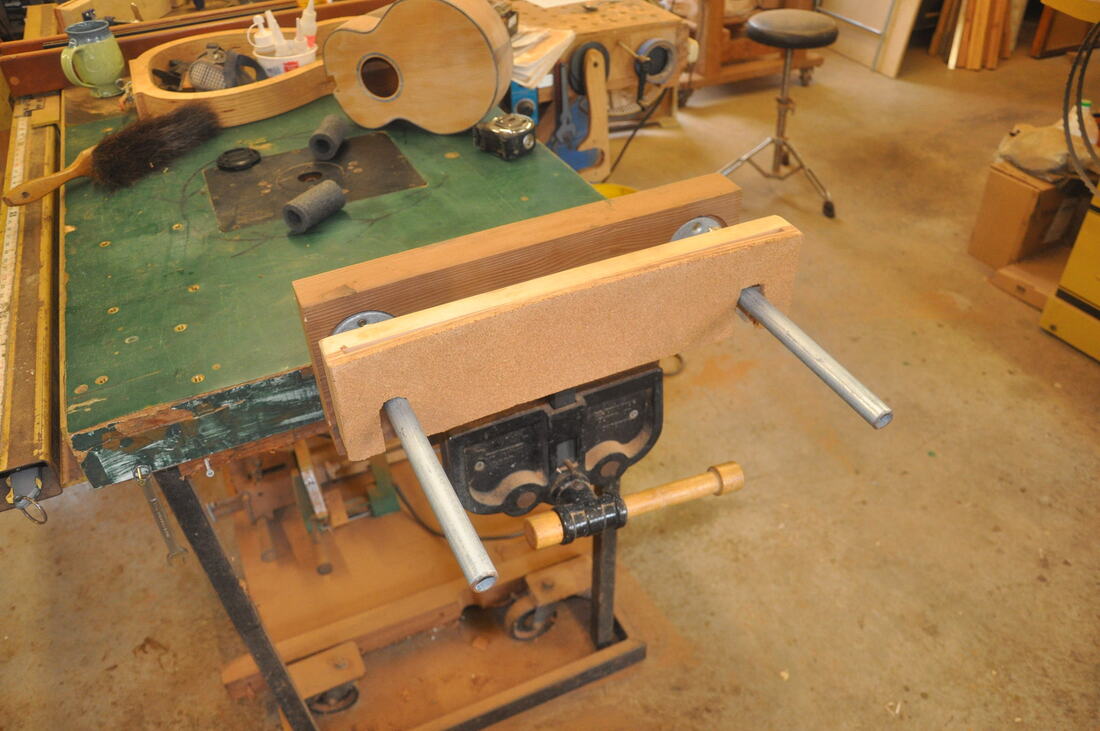
Front view of vise
Close-up of flange that pipe screws into.
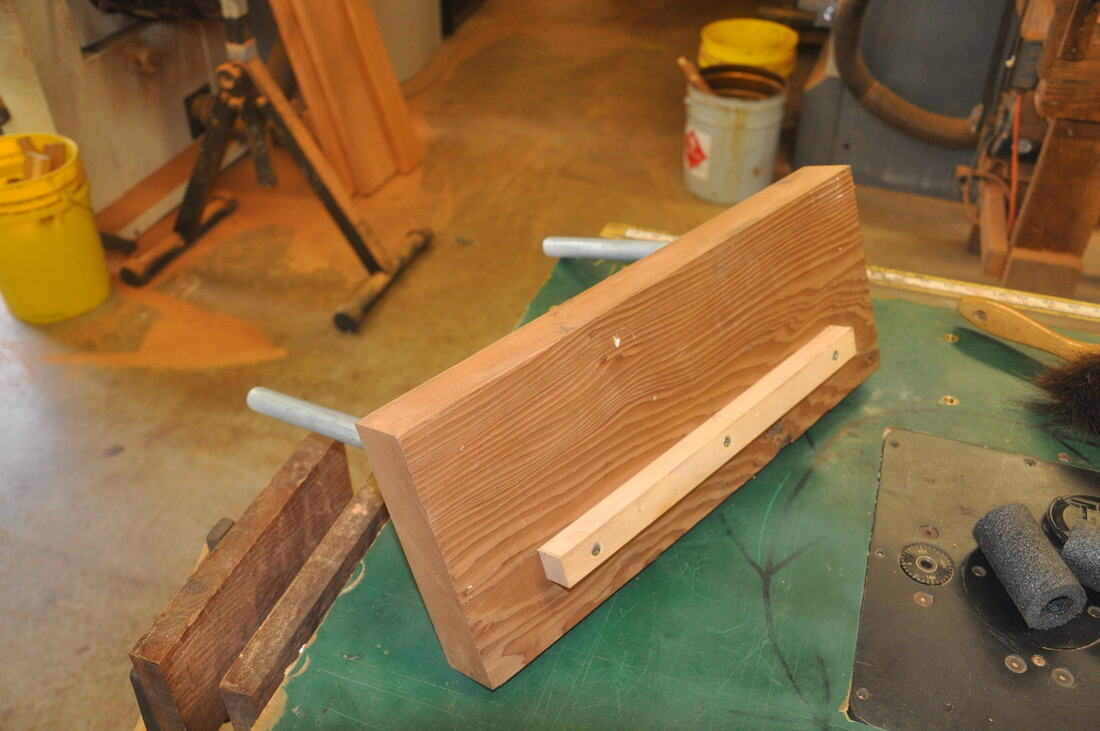
Backing board that allows me to mount the vise in another vise. Cleat automatically aligns the vise level when I drop the Moxon into another vise.
View of flanges mounted to the backing board
Rear pipe clamp mechanism mounted to rear jaw
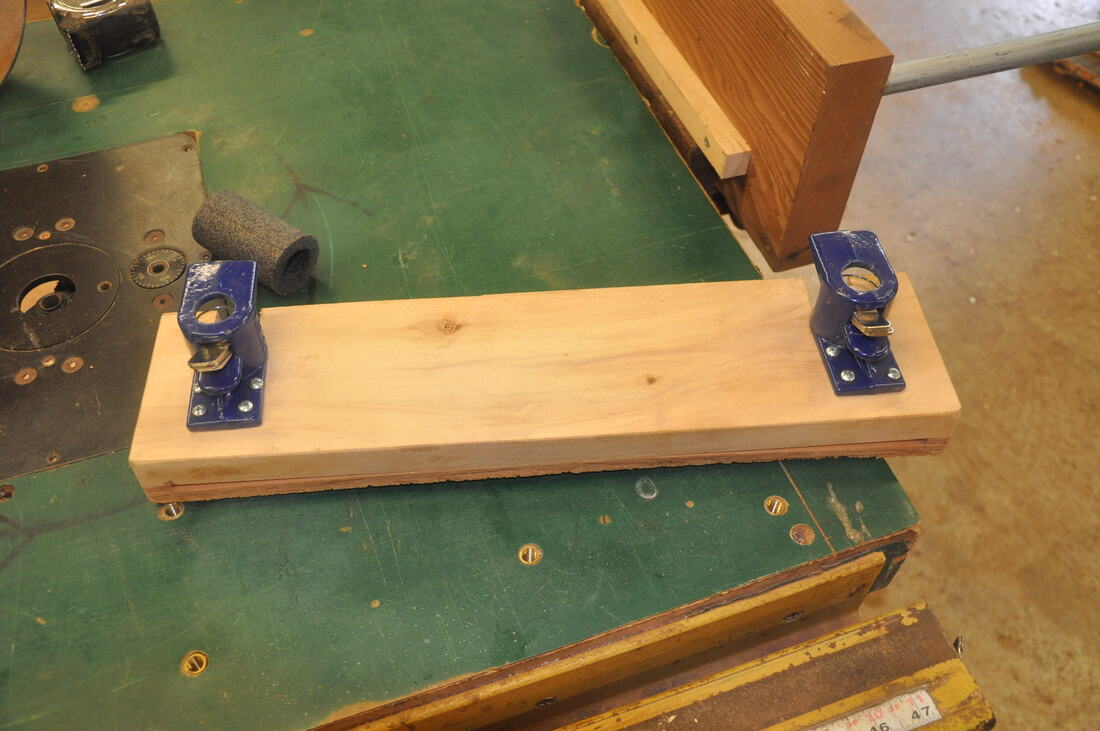
Rear jaw mounted onto the pipes. Note clamp quick release tabs are pointing up.
Note the slots on the jaw. You could just drill holes and slip the pipes through, but the slots gave me more adjustment room. I clamped both jaws together, drilled a 1" hole through both at the same time on the drill press, and then used the bandsaw to cut to the hole to make the slot.
Pipe insulation foam to protect dings to instruments
Another view of the slotted holes
Screw mechanism mounted to face of front jaw.
The shim that creates the radius on the jaws. The 1/4" plywood jaw face is screwed down to the 7/8" jaw in the middle and the shims raise the ends to make the radius.
The completed Moxon vise. It is easy to build once you get started. You'll love having it in your shop!