Making Kerfing 1
Kerfed linings are the reinforcing strips that are glued onto the sides where the top and back meet the sides to increase the gluing surface of the joint. The kerf is the slot cut by the blade and the process itself is usually known as making kerfing. Some builders prefer to use solid linings with out any kerf slots. These are usually prebent and even then it is very difficult to have perfect contact between the lining and the sides. I don’t like gaps, even if I can’t see them! I use kerfed linings because they are light weight and easy to glue to any side shape.
Many woods can be used for kerfed linings, but since we are usually trying to reduce excess weight in our instruments it makes sense to use something light. Basswood, spruce, and mahogany are frequently used woods. Most instrument making wood is cut into quartersawn pieces for use, but in the case of kerfing, flatsawn pieces may sometimes bend better. It depends upon the species of wood you are using. You just have to try it on scrap first.
To begin the process of making kerfing fo ukuleles, I first resaw and finish sand the wood into sheets of stock about 3/16" thick by 18" long by as wide as I can get it. I try to get the stock at least 5-6" wide if possible. Over 6" becomes difficult for me because it becomes difficult to hold the wood down as it passes over the blades, making for uneven depths of cut on the kerf slots. The wider the stock, the less work you’ll end up doing to make strips. Because long length strips of kerfing for guitars is easy to break, I normally make it in 2 shorter lengths and match the ends carefully where they join.
This tutorial is for making kerfing on a tablesaw. It requires a saw with at least 1 miter slot, and preferably 2. If you have only 1, make sure the runner is a very snug fit in the slot.
I use 6 1/2" x 60 tooth carbide tip Diablo brand blades from Home Depot. I find their carbide tip width to be what I like to see in kerfing. Just as a side note, I often use blades as small as 5" on my 10" tablesaw. They are cheaper and the smaller teeth don't chip out as much on thin wood.
The process detailed here uses anywhere from 1 to 4 blades, or whatever you can fit on your saw arbor. The more blades, the faster the cutting goes, but the same jig works for whatever number of blades you decide to use.
In addition to blade of your choice, you will need to make a simple sled with a moveable fence for the index pin and wood spacers to go between the blades.
The Spacers
You will need to make 1 less spacer than the number of blades you use. i.e. 3 blades need 2 spacers. Most saws have a collar on the arbor of the same size on the inside of the blade and the ouside. The spacers can be made from any hardwood. Run a sheet of wood through your sander to the thickness of the space you want in your kerfed lining. Make the spacers the same diameter as the collar. Your arbor is probably 5/8", so use a compass to lay out the outside diameter of the spacers. Then drill the appropriate size arbor hole, and cut the outside diameter on the bandsaw. Cut them as clean as you can, but they don't need to be perfect.
The Sled
It does not matter which side you put the pin. If you want to work from rigs how far apart your slots will be. You want all slots to be the same distance apart. It may take a little experimentation to get it right. Rather than moving the pin around and making a bunch of small holes, it is usually easier to slightly shift the wooden fence. Now file the sides of the pin flat so that they are a good fit in the blade slot. The last thing you will need is a hold down block. You must keep the stock flat against the table as it crosses the blade or the slots will not remain a constant depth. I use a piece of 2" x 6" or 2" x 8" with a handhold on top.ht to left, put it to the left side of the blade. To work the other way, do the opposite. The pin should be slightly thicker than the slot your blade cuts. Drill a pilot hole about 1/16" above the surface of the table and firmly insert the pin. The distance from the blade to the pin determine the spacing between the kerf slots.
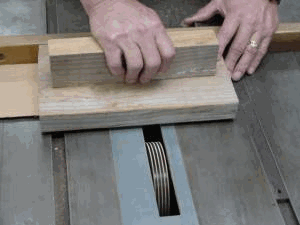
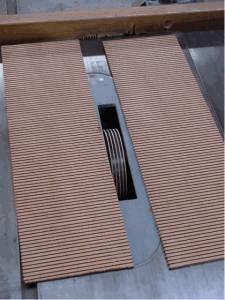
You’re ready to make perfect kerfed linings! Raise the blade so that it is almost all the way through the thickness of the sheet. Make a few test cuts to make sure that you have cut deep enough to allow the linings to bend easily. Push your stock up against the pin for the first cut. DO NOT SLIDE THE STOCK BACK THROUGH THE BLADE. It is very easy to have the stock catch and spin on the blade. Lift the stock after each cut and place the last slot on the guide pin.
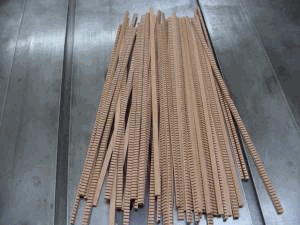
Once you have completely kerfed the sheet, you can cut it into strips on either the table saw or the bandsaw.
Once you have completely kerfed the sheet, you can cut it into strips on either the table saw or the bandsaw.
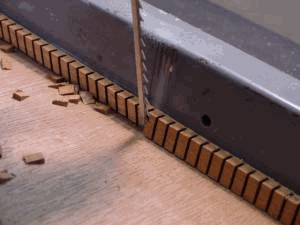
To make triangular linings I strip the stock on the tablesaw and then cut the angle on the bandsaw with the table tilted.


