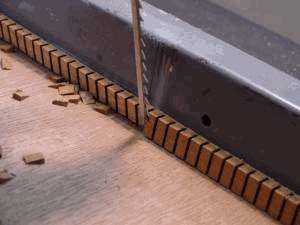
Making Kerfing
Kerfed linings are the reinforcing strips that are glued onto the sides where the top and back meet the sides. The kerf is the slot cut by the blade and the process is usually known as kerfing. Some builders prefer to use solid linings. These are usually prebent and even then it is almost impossible to have perfect contact between the lining and the sides. I don’t like gaps, even if I can’t see them! I use kerfed linings because they are light weight and easy to glue to any side shape.
Many woods can be used for kerfed linings, but since we are trying to reduce excess weight in our instruments it makes sense to use something light. Basswood and mahogany are frequently used woods. Most instrument making wood is cut into quartersawn pieces for use, but in the case of lining, flatsawn pieces often work better. They are much less prone to breakage during installation.
To begin the process of making kerfed lining, I first resaw and finish sand the wood into sheets of stock about 3/16" thick by 18" long by as wide as I can get it. I try to get the stock at least 5-6" wide if possible. The wider the stock, the less work you’ll end up doing to make strips.
The best tool to use for cutting the kerfs is the tablesaw.
The slot can be as wide as you want, but too thin makes the lining impossible to bend around sharp corners and too wide makes it break easily. I use a 5" x .057 HSS Jewelers Saw Blade from MSC Industrial (Part #03306578). You can find them on the web. It has a 1" arbor hole, but adapters to size down to 5/8"are available from good hardware stores. They are quite a bit thicker than the blade, so you have to sand them down. If have trouble doing that, contact me and I'll tell you how. MSC does not have the adaptor. You could also use one of the thin kerf blades that you can find at Ace Hardware. In fact their 6 1/2" carbide tipped 32 tooth blade is my favorite one to use on many of my small projects. Since I make kerfed linings to sell as well as for my own use, I have had spacers made that allow me to use 4 or 5 blades at one time to speed up the process. However, even with one blade the process goes fairly quickly.
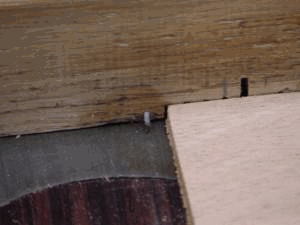
In addition to a thin blade, you will need a simple miter gauge. Most saws come with these. On a miter gauge, screw a wooden fence long enough to support the sheet of lining stock, both to the right and the left of the blade. The guide for cutting is a pin inserted in the fence that slips into the previously cut kerf slot.
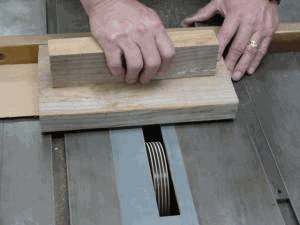
It does not matter which side you put the pin. If you want to work from rigs how far apart your slots will be. You want all slots to be the same distance apart. It may take a little experimentation to get it right. Rather than moving the pin around and making a bunch of small holes, it is usually easier to slightly shift the wooden fence. Now file the sides of the pin flat so that they are a good fit in the blade slot. The last thing you will need is a hold down block. You must keep the stock flat against the table as it crosses the blade or the slots will not remain a constant depth. I use a piece of 2" x 6" or 2" x 8" with a handhold on top.ht to left, put it to the left side of the blade. To work the other way, do the opposite. The pin should be slightly thicker than the slot your blade cuts. Drill a pilot hole about 1/16" above the surface of the table and firmly insert the pin. The distance from the blade to the pin determine the spacing between the kerf slots.
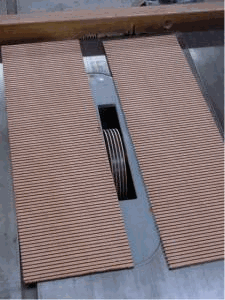
You’re ready to make perfect kerfed linings! Raise the blade so that it is almost all the way through the thickness of the sheet. Make a few test cuts to make sure that you have cut deep enough to allow the linings to bend easily. Push your stock up against the pin for the first cut. DO NOT SLIDE THE STOCK BACK THROUGH THE BLADE. It is very easy to have the stock catch and spin on the blade. Lift the stock after each cut and place the last slot on the guide pin.
Once you have completely kerfed the sheet, you can cut it into strips on either the table saw or the bandsaw.
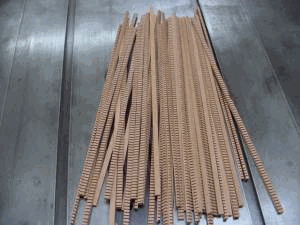
Once you have completely kerfed the sheet, you can cut it into strips on either the table saw or the bandsaw.
To make triangular linings I strip the stock on the tablesaw and then cut the angle on the bandsaw with the table tilted.


